Table of Contents
How to use WPS Button on Printer?
Before we go into details of the WPS Button on Printer, If you want to know about WPS please refer article what is WPS (Wi-Fi Protected Setup). This article does not cover specific printer brands and models but is a general guide. At the process level it will work will most WPS button enabled printers.
Pre-requisites
Your Existing network should support WPS. and the Printer should also support WPS.
Find WPS Pin On Printer:
The WPS button is located as a physical button on many printers , some of them may have this as a touch menu in the touch panel of the printer.
WPS button would have an icon something like this


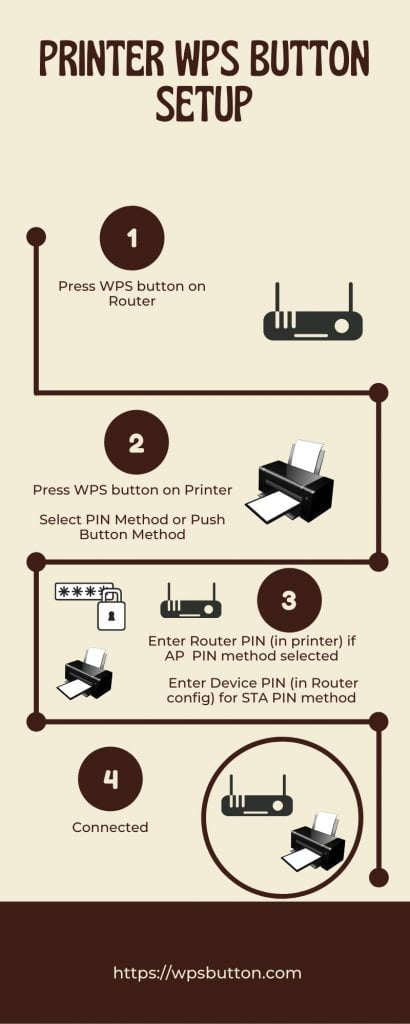
Steps to Configure (Push Button Method)
Step 1: Make sure to Power On both your Printer and Router
Step 2: Press the WPS button on the Printer for 4 to 5 seconds. The WPS LED on the Printer should start blinking.
Step 3: If your printer has a touch screen panel, go to the main menu and look for wireless setup. Enable / Start the wireless setup mode. Your printer would be initiating a connection request with this.
Step 4: Within 2 minutes, press the WPS button of the router that you want to connect. Wait for at least 2 minutes while the printer connects to your existing wireless network
Step 5: The WPS feature on your printer will configure the network settings automatically and the WPS LED indicator will stop blinking.
With the above steps your printer would be connected to the wireless network and you can test by doing a test print and to check from your PC you need to install the printer driver on PC to print.
Steps to Configure (PIN Based Setup)
Now Your Printer is Connected To Wireless Network & in order to Print, All you have to do is Download the Printer app Or Driver On your Laptop & Phone & start Printing.
Step 1: Make sure to Power On both your Printer and Router
Step 2: located the WPS Pin For Router ( From printed label or dynamically generated from router configuration) Refer to this article what is WPS (Wi-Fi Protected Setup) for more details on how WPS PIN’s are generated.
Step 3: Press the WPS button on the Printer for 4 to 5 seconds. The WPS LED on the Printer should start blinking.
Step 4: On your printer touch panel Go to the Wireless Setup Or Look For Network Settings
- Select Wi-fi Protected Setup then Select Pin Method ( for pin authentication)
Your printer would be initiating a PIN based connection request with this.
Step 5: Within 2 minutes, press the WPS button of the router that you want to connect. Wait for at least 2 minutes while the printer connects to your existing wireless network
Step 6: Use Menu Touch Keys on printer to enter the WPS Pin of the router you had noted in step 2.
With the above steps, your printer would be connected to the wireless network with PIN based WPS connection and you can test by doing a test print and to check from your PC you need to install the printer driver on PC to print.


